
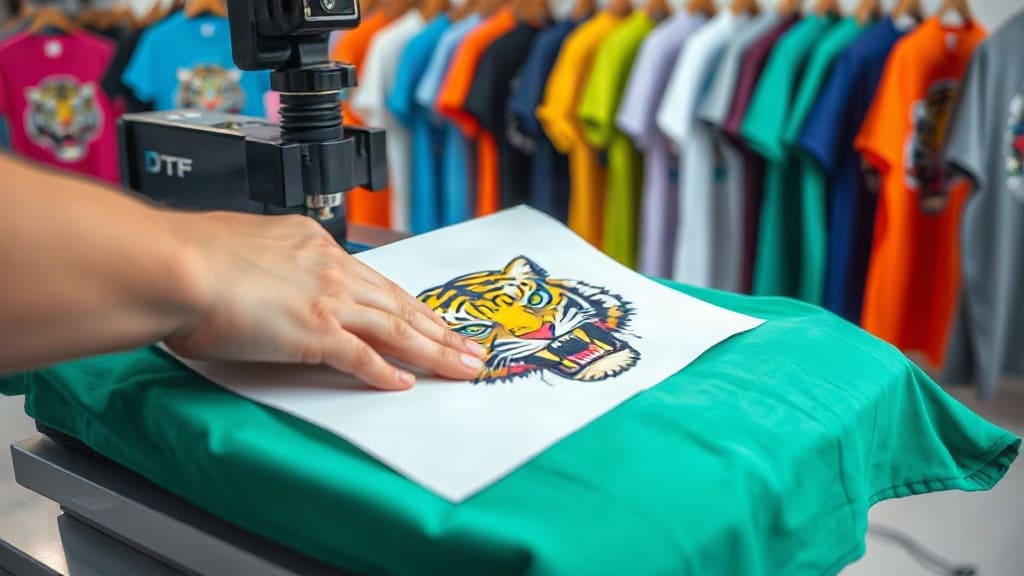
DTF transfers have taken the custom apparel world by storm, offering a simple yet powerful way to create vibrant, durable designs on fabric. Whether you're a hobbyist with a heat press at home or a growing print business, these transfers provide an accessible entry point into high-quality garment decoration. In this guide, I'll share practical insights from my own journey, covering what DTF transfers are, how to apply them successfully, and how to avoid common pitfalls. By the end, you'll have the knowledge to produce professional-looking results and even build a profitable side hustle.
What Are DTF Transfers?
DTF stands for Direct to Film. Essentially, a design is printed onto a special PET film using a DTF printer and adhesive powder is applied to the wet ink. Once cured, the film holds a transferable image that can be pressed onto almost any fabric. Unlike traditional heat transfer vinyl (HTV), DTF transfers allow for full-color, highly detailed prints without the need to weed out excess material. They also work well on a variety of materials, including cotton, polyester, and blends, which makes them incredibly versatile.
Why Choose DTF Transfers?
The appeal of DTF transfers lies in their ease and quality. From personal experience, I remember struggling with HTV on stretchy fabrics, where designs would crack or peel. DTF transfers, on the other hand, offer a softer hand feel and excellent stretchability. They also produce vibrant colors that don't fade easily. For businesses, this technology reduces production time because you can print multiple designs on a single film and cut them as needed, minimizing waste.
How to Use DTF Transfers: Step-by-Step
Applying a DTF transfer is straightforward, but attention to detail is key. Here's the process I follow for consistent results.
What You'll Need
- A heat press (or a high-quality home iron, though a press is recommended)
- DTF transfer film with your design printed and powdered
- Parchment paper or a non-stick sheet
- A flat, heat-resistant surface
Step 1: Preheat Your Fabric
Place your garment on the press and preheat it for a few seconds to remove wrinkles and moisture. This ensures better adhesion.
Step 2: Position the Transfer
Place the DTF transfer face down (film side up) on the fabric where you want the design. Make sure it's centered and straight. Use a ruler or tape to help align if needed.
Step 3: Press with Medium Pressure
Set your heat press to the recommended temperature and time. Typically, it's around 320°F (160°C) for 10-15 seconds with medium to firm pressure. Consult the instructions that come with your specific transfer, as variations exist.
Step 4: Peel Hot or Cold?
This is crucial. Some DTF transfers require hot peeling, while others need to cool before peeling. The general rule is to peel warm if the adhesive is cold-peel type, but check the manufacturer's guidance. I always test a small corner first. If it resists, wait a few seconds and try again.
Step 5: Post-Press (Optional)
After peeling, some people place a protective sheet over the design and press again for a few seconds to enhance durability. I've found this helps, especially for items that will be washed frequently.
Troubleshooting Common DTF Transfer Issues
Even with careful application, issues can arise. Here are solutions to frequent problems I've encountered.
Poor Adhesion
If your design lifts after washing, it's often due to insufficient heat or pressure. Increase the temperature by 5-10 degrees and ensure your press is applying even pressure. Also, make sure the fabric is preheated to eliminate moisture.
Cracking or Peeling
This usually happens when the transfer is pressed too hot or for too long, causing the adhesive to over-cure. Conversely, under-curing can also lead to issues. Follow the recommended settings and do a test press on a scrap piece of fabric first.
Colors Not Vibrant
If the colors look dull, it might be because the film wasn't printed with enough ink or the wrong powder was used. For best results, use high-quality DTF inks and powder. Also, ensure your printer is properly calibrated.
Tips for Getting Professional Results
To elevate your DTF transfers, pay attention to the following details.
Choose the Right Transfer Provider
If you're not printing your own transfers, choose a supplier known for consistent quality. Look for reviews that mention color accuracy and durability. I've learned that cheaper options often compromise on adhesive or film quality, leading to failures.
Fabric Considerations
DTF works on many fabrics, but for best results, use fabrics with at least 50% cotton. For polyester, a lower temperature and shorter press time are necessary to avoid melting the fibers. Always test on a small area first.
Storage of Transfers
Keep your DTF films in a cool, dry place away from direct sunlight. Humidity can affect the adhesive, so a sealed bag with a desiccant is a good idea.
How to Start a DTF Transfers Business
Many people, including myself, have turned DTF transfers into a profitable venture. The low startup cost compared to screen printing makes it attractive. Here are some steps to consider.
Identify Your Niche
Focus on a specific market, such as custom pet portraits, sports team apparel, or boutique children's clothing. This helps you tailor your designs and marketing.
Invest in Essential Equipment
If you plan to print your own transfers, you'll need a DTF printer, proper inks, film, and powder. However, many small businesses start by ordering custom DTF transfers from a supplier and only invest in a heat press. This minimizes upfront costs.
Set Your Pricing
Calculate your costs per transfer (including film, ink, powder, and electricity) and add your desired profit margin. Research competitor prices in your area to stay competitive.
Market Your Services
Utilize social media platforms like Instagram and TikTok to showcase your work. Before-and-after videos and time-lapses of pressing are engaging. Offer promotions to attract first-time customers and encourage word-of-mouth referrals.
DTF Transfers vs. Other Methods
Understanding the differences between DTF and other techniques helps you make informed decisions for your projects.
DTF vs. HTV
HTV requires cutting and weeding, which is time-consuming for intricate designs. DTF transfers are ready to press, so they save time and allow for more detailed artwork. HTV is often cheaper for single-color logos, but DTF excels in multi-color photorealistic prints.
DTF vs. Screen Printing
Screen printing is ideal for large orders of the same design due to its low per-unit cost. However, it has a high setup cost and isn't practical for small runs or individual items. DTF transfers offer flexibility for low-quantity custom orders, making them perfect for print-on-demand.
DTF vs. Sublimation
Sublimation works only on polyester and white or light-colored garments, as the dye bonds with the fabric. DTF can be used on dark and light fabrics with no issue, and it works on cotton, making it more versatile.
Frequently Asked Questions about DTF Transfers
Can I use a regular home iron for DTF transfers?
Yes, you can use a home iron, but it's challenging to achieve the consistent pressure and heat required. If you use an iron, press firmly with a back-and-forth motion for about 30 seconds per section. However, for reliable results, a heat press is highly recommended.
How many washes do DTF transfers last?
With proper application and care, DTF transfers can withstand 50 to 100 washes. To extend the life, wash garments inside out in cold water and avoid using high heat in the dryer.
Can DTF transfers be used on dark fabrics?
Absolutely. One of the major advantages of DTF is that it works beautifully on dark fabrics without needing a white underbase. The adhesive layer includes white ink that ensures colors pop.
What is the ideal temperature and time for pressing DTF transfers?
Most DTF transfers require a temperature between 300°F and 350°F (149°C to 177°C) for about 10 to 20 seconds. Always check the specific instructions from your transfer supplier, as different films and powders may have slight variations.
Are DTF transfers eco-friendly?
DTF printing does produce some waste, such as the PET film used as a carrier. However, many suppliers are working on recyclable films and water-based inks. For a more sustainable approach, consider using water-based DTF inks and disposing of film responsibly.
Final Thoughts
Mastering DTF transfers opens up a world of creative and business opportunities. With a little practice and the right techniques, you can produce durable, vibrant prints that rival commercial products. Start by experimenting with small projects, learn from each attempt, and soon you'll be creating custom apparel that impresses customers and friends alike. Whether you're making a one-off gift or building a brand, DTF transfers are a valuable tool in your arsenal.